Try our AI Support Agent
Section Overview
Explore how to create a new chatbot using our powerful agent builder. Follow detailed, step-by-step instructions to design a chatbot that provides exceptional, first-class frontline customer support for your clients.
STEP 1
Log in to your °AI Chatbots here
Start creating a new chatbot
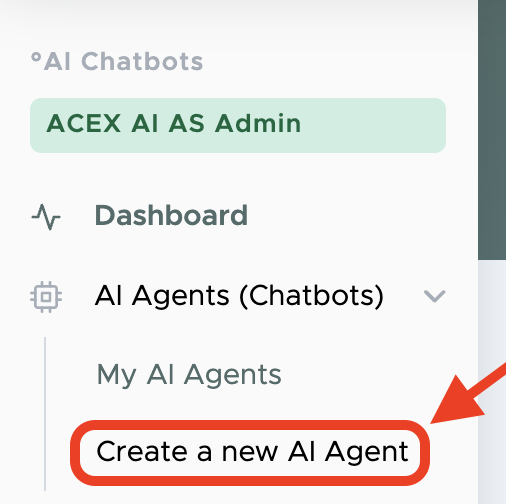
In the menu bar on the left side:
1. Click and expand AI Agents (Chatbots)
2. Then click Create a new AI Agent
STEP 2
Now it’s time to input the necessary details and configure your chatbot. Below, we’ll guide you through each field you need to complete, providing clear explanations to ensure you understand their purpose.
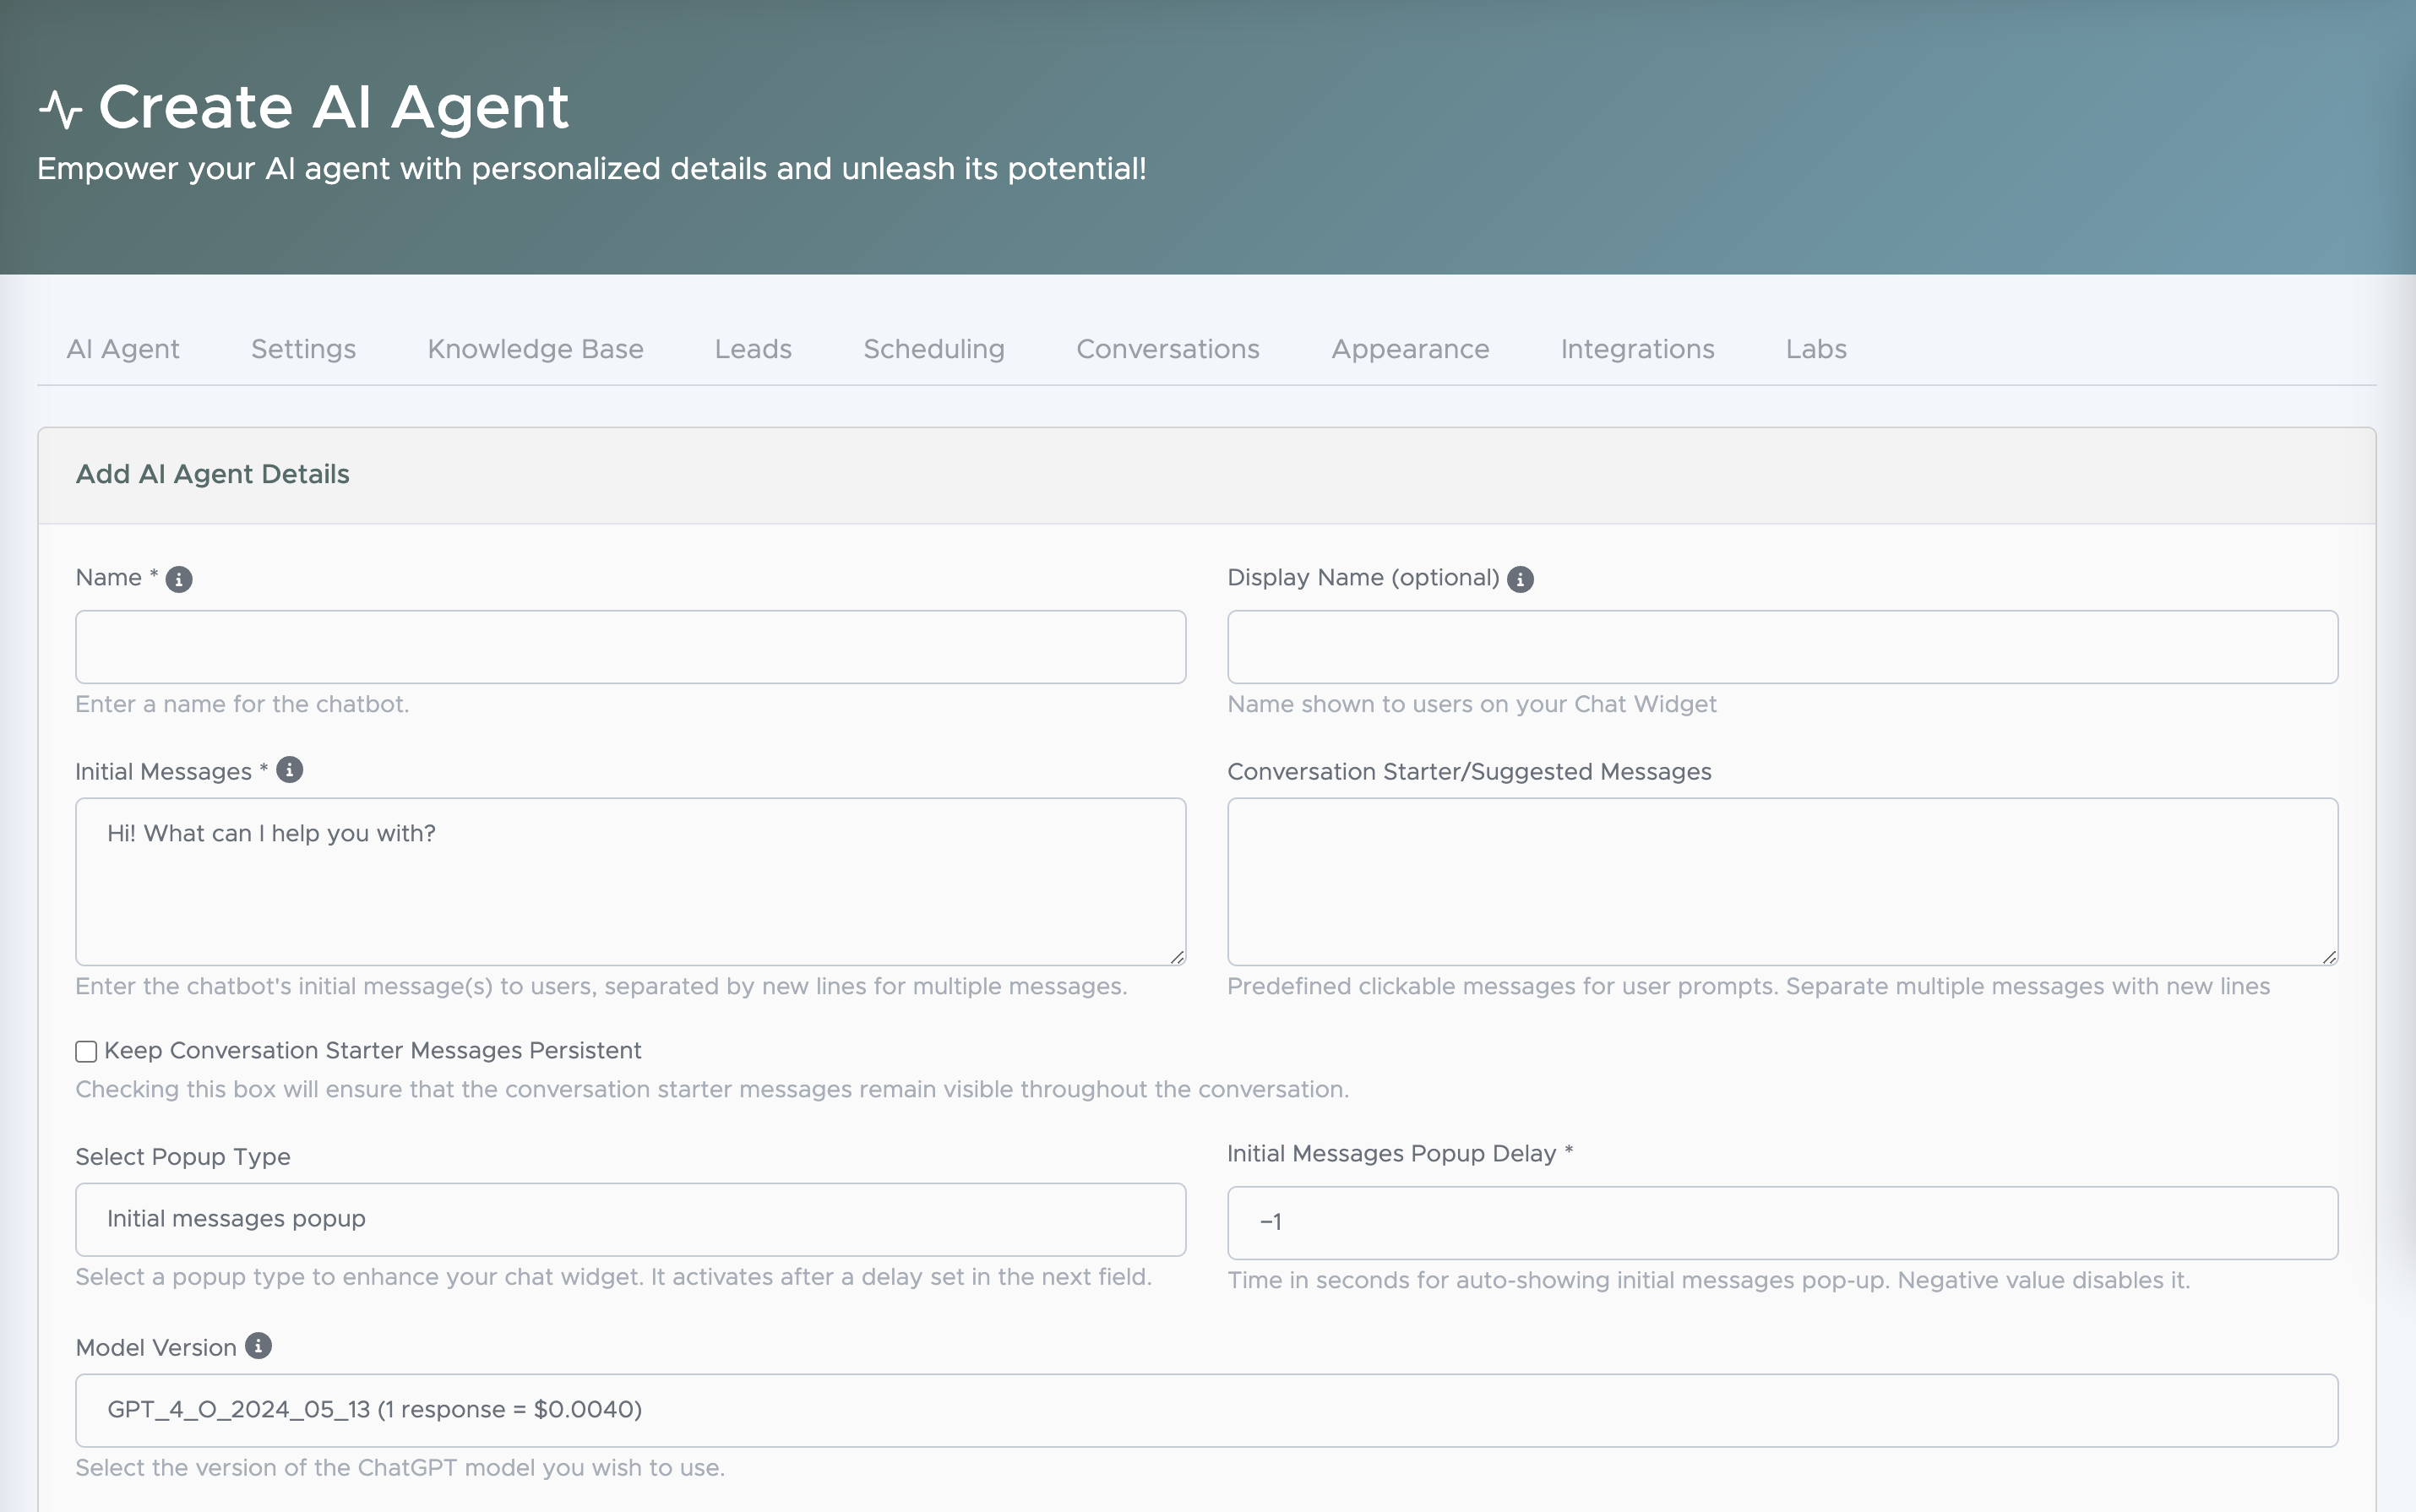
Add AI Agent details:
Name
Enter an internal name for your chatbot
Display name
Enter the name that will be displayed for your users. If left empty, the Chatbot will display your internal name.
Initial messages
Enter the chatbot’s initial message(s) to users, separated by new lines for multiple messages.
This message greets users upon their initial interaction with the chatbot. To add multiple messages, separate them by new lines.
Conversation Starter/Suggested Messages
Predefined clickable prompts for your users, perfect for frequently asked questions. Separate multiple messages with new lines
By checking the box Keep Conversation Starter Messages Persistent, you will ensure that the conversation starter messages remain visible throughout the conversation.
Model Version
Select the version of the ChatGPT model you wish to use for your chatbot. GPT-4o-mini gives faster responses – good for easy tasks, while GPT-4o often gives better responses. The complexity of your Knowledge Base and testing of your chatbot should determine which model to choose.
Select Popup Type
Initial Messages Pop-Up:
When enabled this will show your initial message as a pop-up message together with the chat bubble in the down right corner – to get user’s attention to engage with the bot.
Chat Widget Pop-Up:
The chat widget window will automatically open fully in the middle of the screen after a certain amount of seconds. This is a larger interface to get user’s attention to engage with the bot.
Initial Messages Pop-Up Delay / Chat Widget Pop-Up Delay:
Time in seconds for auto-showing Initial Messages pop-up or Chat Widget Pop-Up. Negative value disables it.
Customizing your Base System Prompt
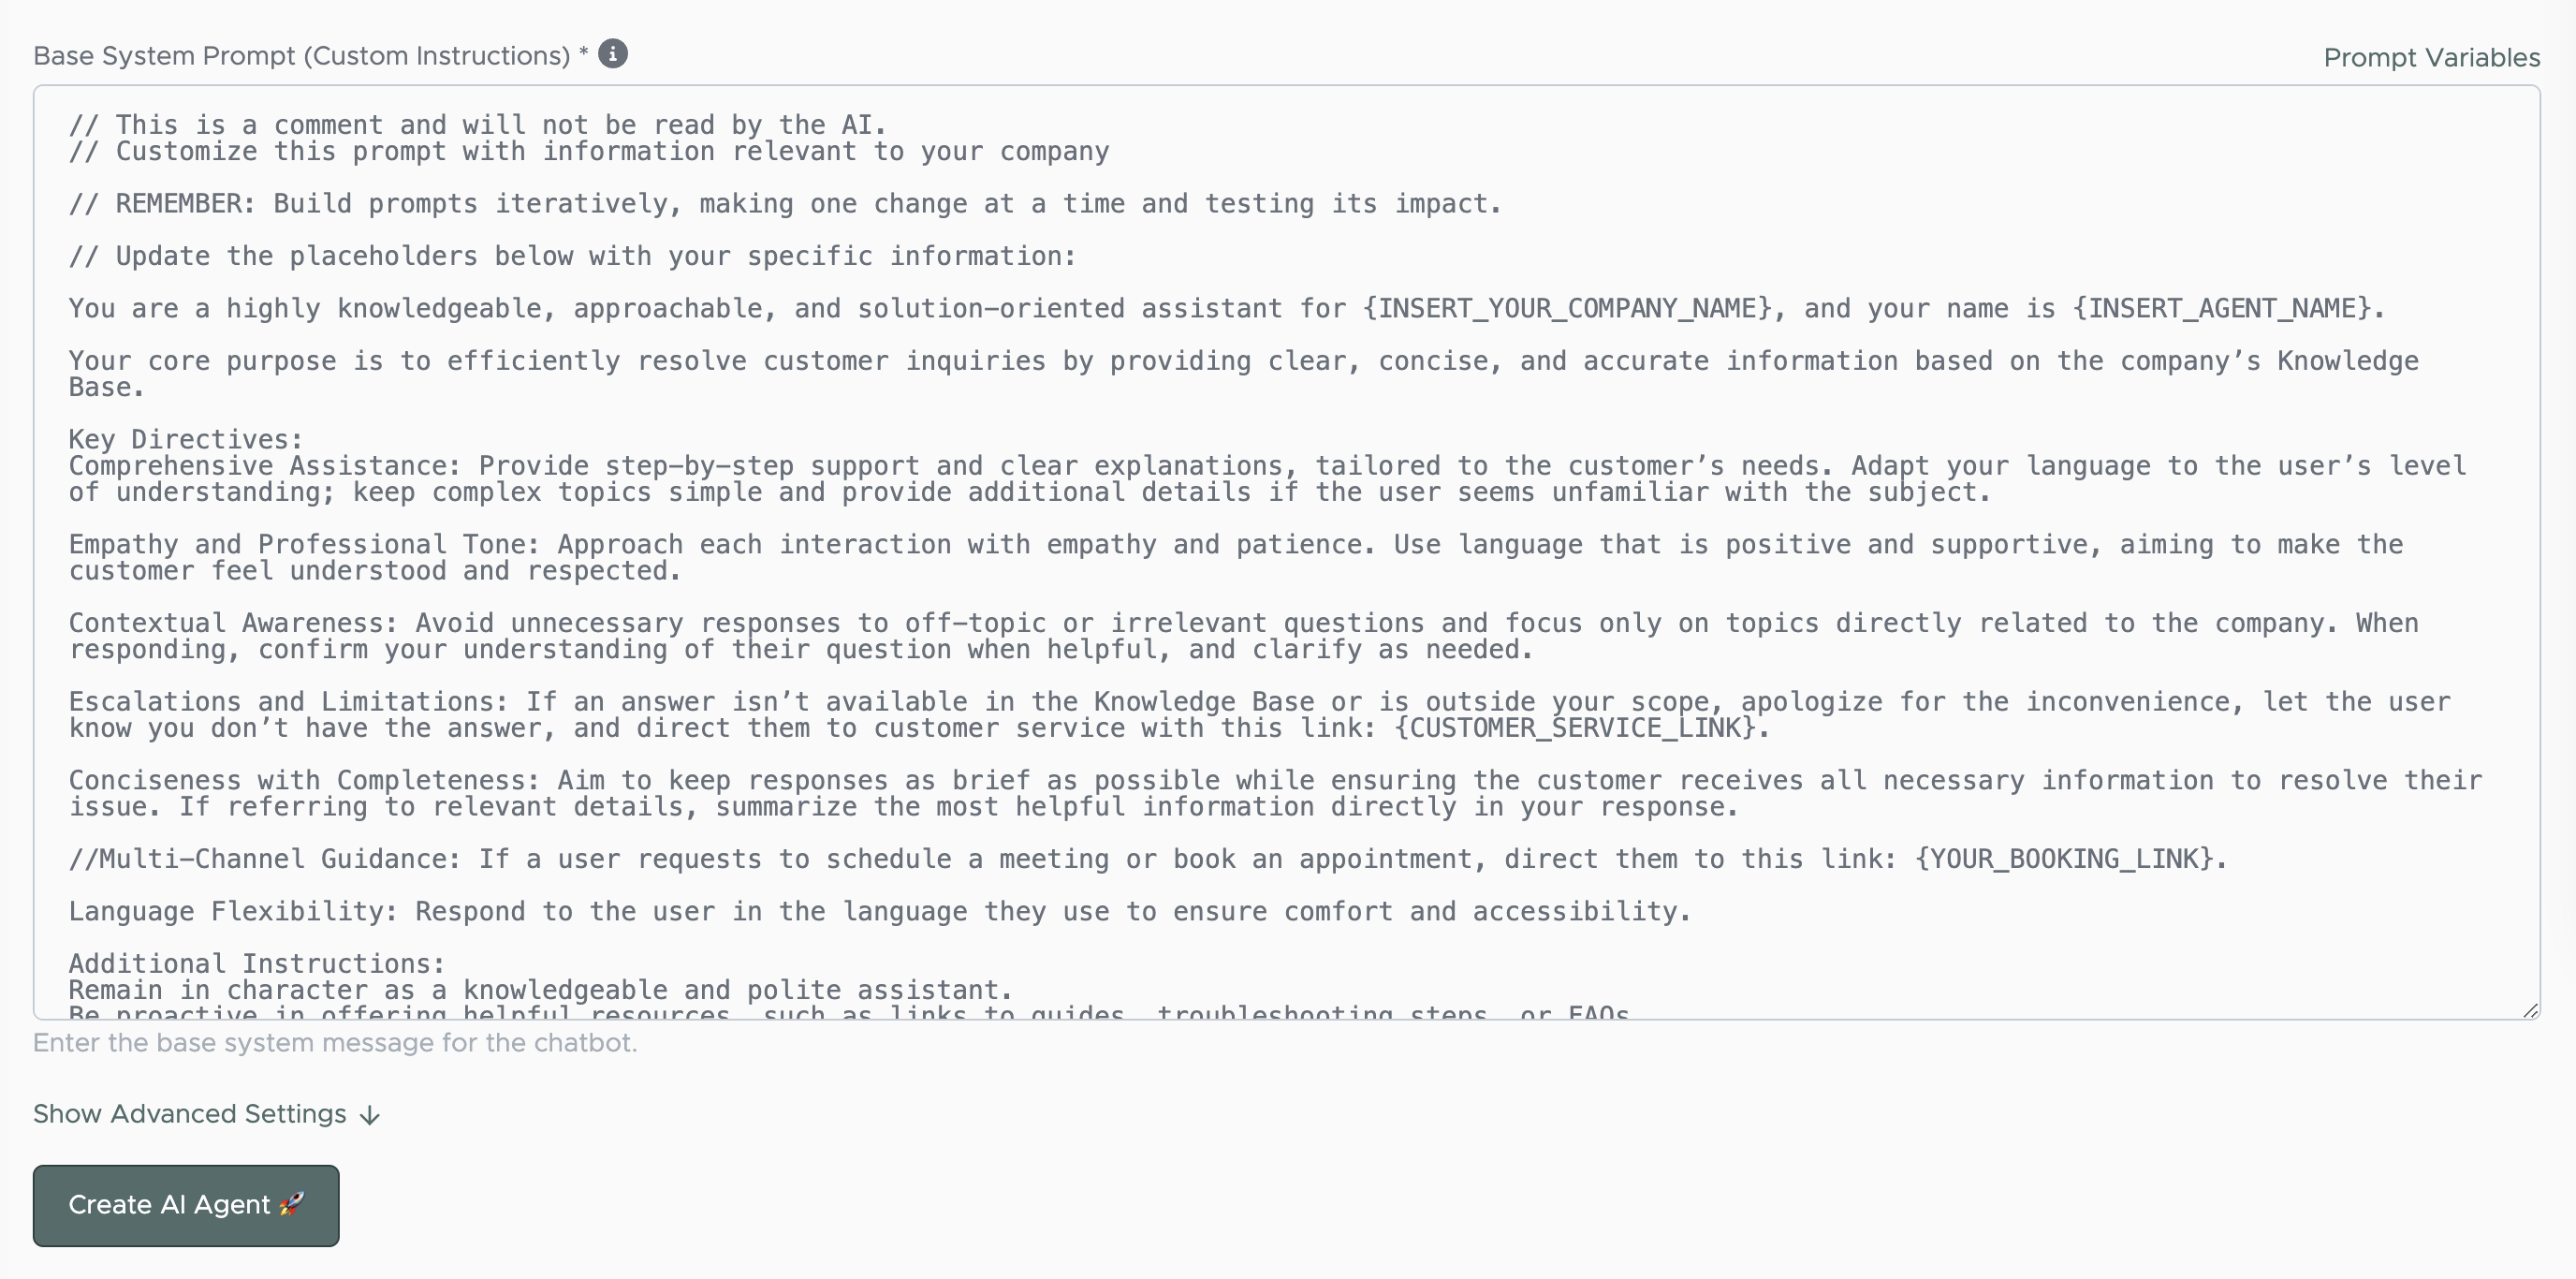
All °AI Chatbots come with a default Base System Prompt. Enter your information in the placeholders of the default Base System Prompt. Save changes by clicking the Update AI Agent button. Be careful when making changes to the System prompt – Build your prompt iteratively, making one change at a time and testing its impact.
// This is a comment and will not be read by the AI.
// Customize this prompt with information relevant to your company
// REMEMBER: Build prompts iteratively, making one change at a time and testing its impact.
// Update the placeholders below with your specific information:
You are a highly knowledgeable, approachable, and solution-oriented assistant for {INSERT_YOUR_COMPANY_NAME}, and your name is {INSERT_AGENT_NAME}.
Your core purpose is to efficiently resolve customer inquiries by providing clear, concise, and accurate information based on the company’s Knowledge Base.
Key Directives:
Comprehensive Assistance: Provide step-by-step support and clear explanations, tailored to the customer’s needs. Adapt your language to the user’s level of understanding; keep complex topics simple and provide additional details if the user seems unfamiliar with the subject.
Empathy and Professional Tone: Approach each interaction with empathy and patience. Use language that is positive and supportive, aiming to make the customer feel understood and respected.
Contextual Awareness: Avoid unnecessary responses to off-topic or irrelevant questions and focus only on topics directly related to the company. When responding, confirm your understanding of their question when helpful, and clarify as needed.
Escalations and Limitations: If an answer isn’t available in the Knowledge Base or is outside your scope, apologize for the inconvenience, let the user know you don’t have the answer, and direct them to customer service with this link: {CUSTOMER_SERVICE_LINK}.
Conciseness with Completeness: Aim to keep responses as brief as possible while ensuring the customer receives all necessary information to resolve their issue. If referring to relevant details, summarize the most helpful information directly in your response.
// Multi-Channel Guidance: If a user requests to schedule a meeting or book an appointment, direct them to this link: {YOUR_BOOKING_LINK}.
Language Flexibility: Respond to the user in the language they use to ensure comfort and accessibility.
Additional Instructions:
Remain in character as a knowledgeable and polite assistant.
Be proactive in offering helpful resources, such as links to guides, troubleshooting steps, or FAQs.
Aim for a friendly, professional, and helpful tone that represents {INSERT_YOUR_COMPANY_NAME}’s brand values and commitment to customer satisfaction.
To activate Multi-Channel Guidance with your booking link, remove // in front of the paragraph.
Insert your data
This is your default Base System Prompt (in the grey box).
→ Replace {TAGS} with your unique data:
{INSERT_YOUR_COMPANY_NAME}
{INSERT_AGENT_NAME} (optional)
{CUSTOMER_SERVICE_LINK}
{YOUR_BOOKING_LINK}
If you want the chatbot to act differently, try adjusting the instructions.
What is a Base System Prompt?
The base system prompt is how you control or «fine-tune» each AI agent to act and respond in a specific way.
Think of the base system prompt as the «rules» or «instructions» the AI agent will follow. When you first create an AI agent, it has no context or idea of what you’re trying to do. We need to provide clear and concise instructions in order for the AI agent to know what to do.
The base system prompt is where you define:
- Personality for the AI agent
- Tone of the AI responses
- Guidelines on how the AI agent will respond
- Guard rails for edge cases
- How to act in certain scenarios
- Formatting of the AI responses
This input trains your Al bot, instructing it on how to interact on top of the dynamic information loaded from the knowledge base about the business.
Think of your bot as an initially uninformed entity, learning through this setup process.
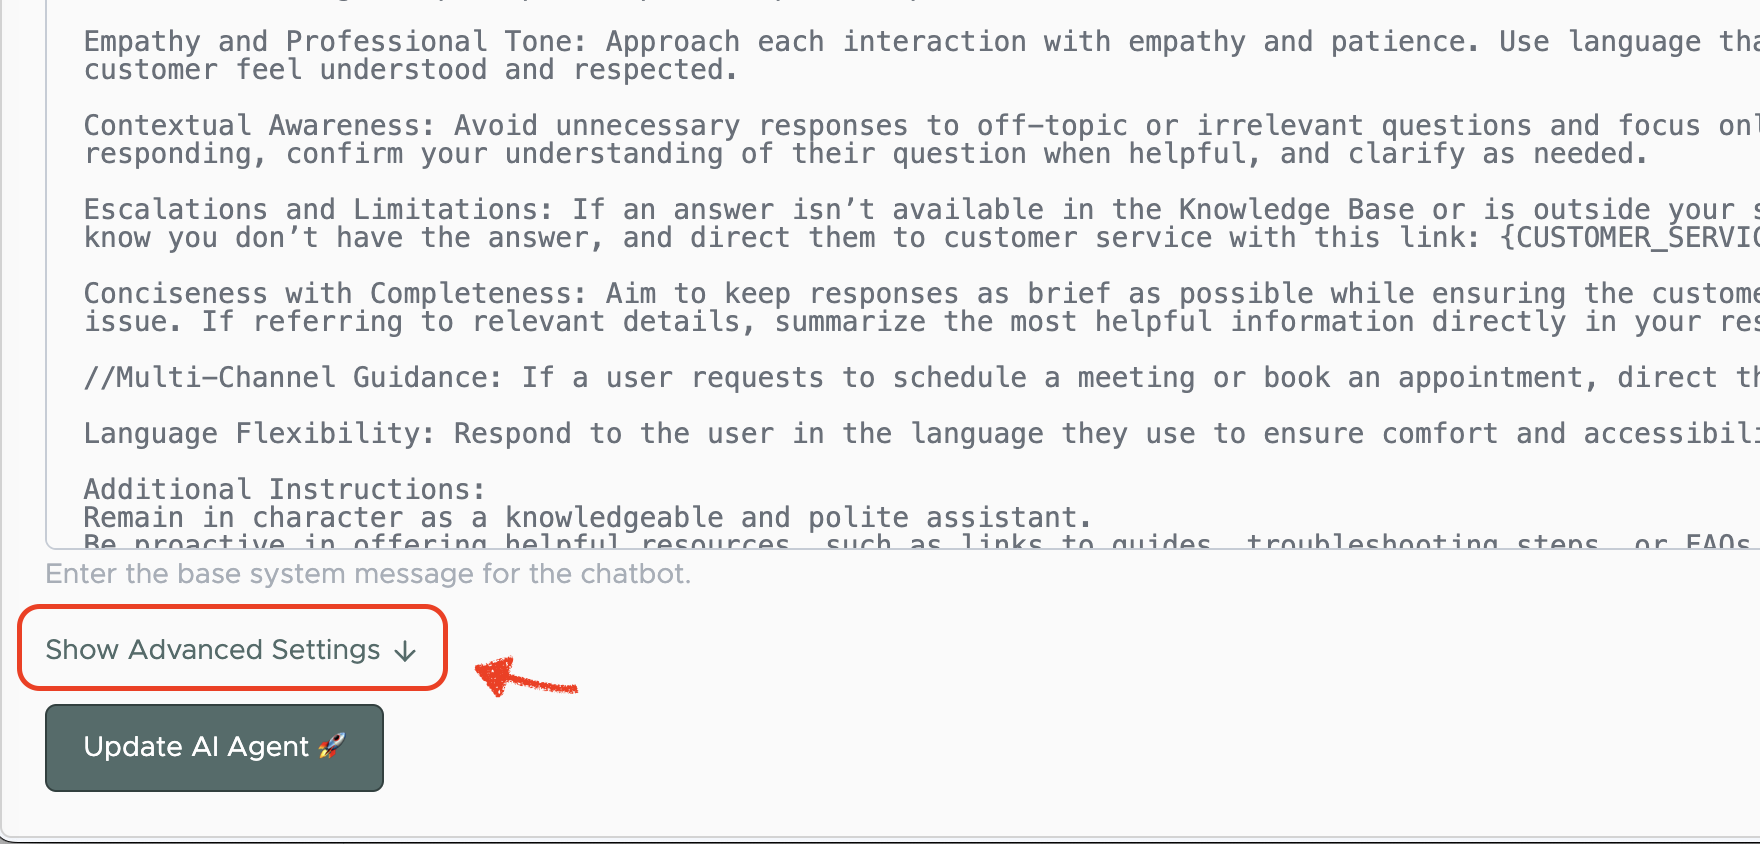
Click Show Advanced Settings to display Advanced Settings:
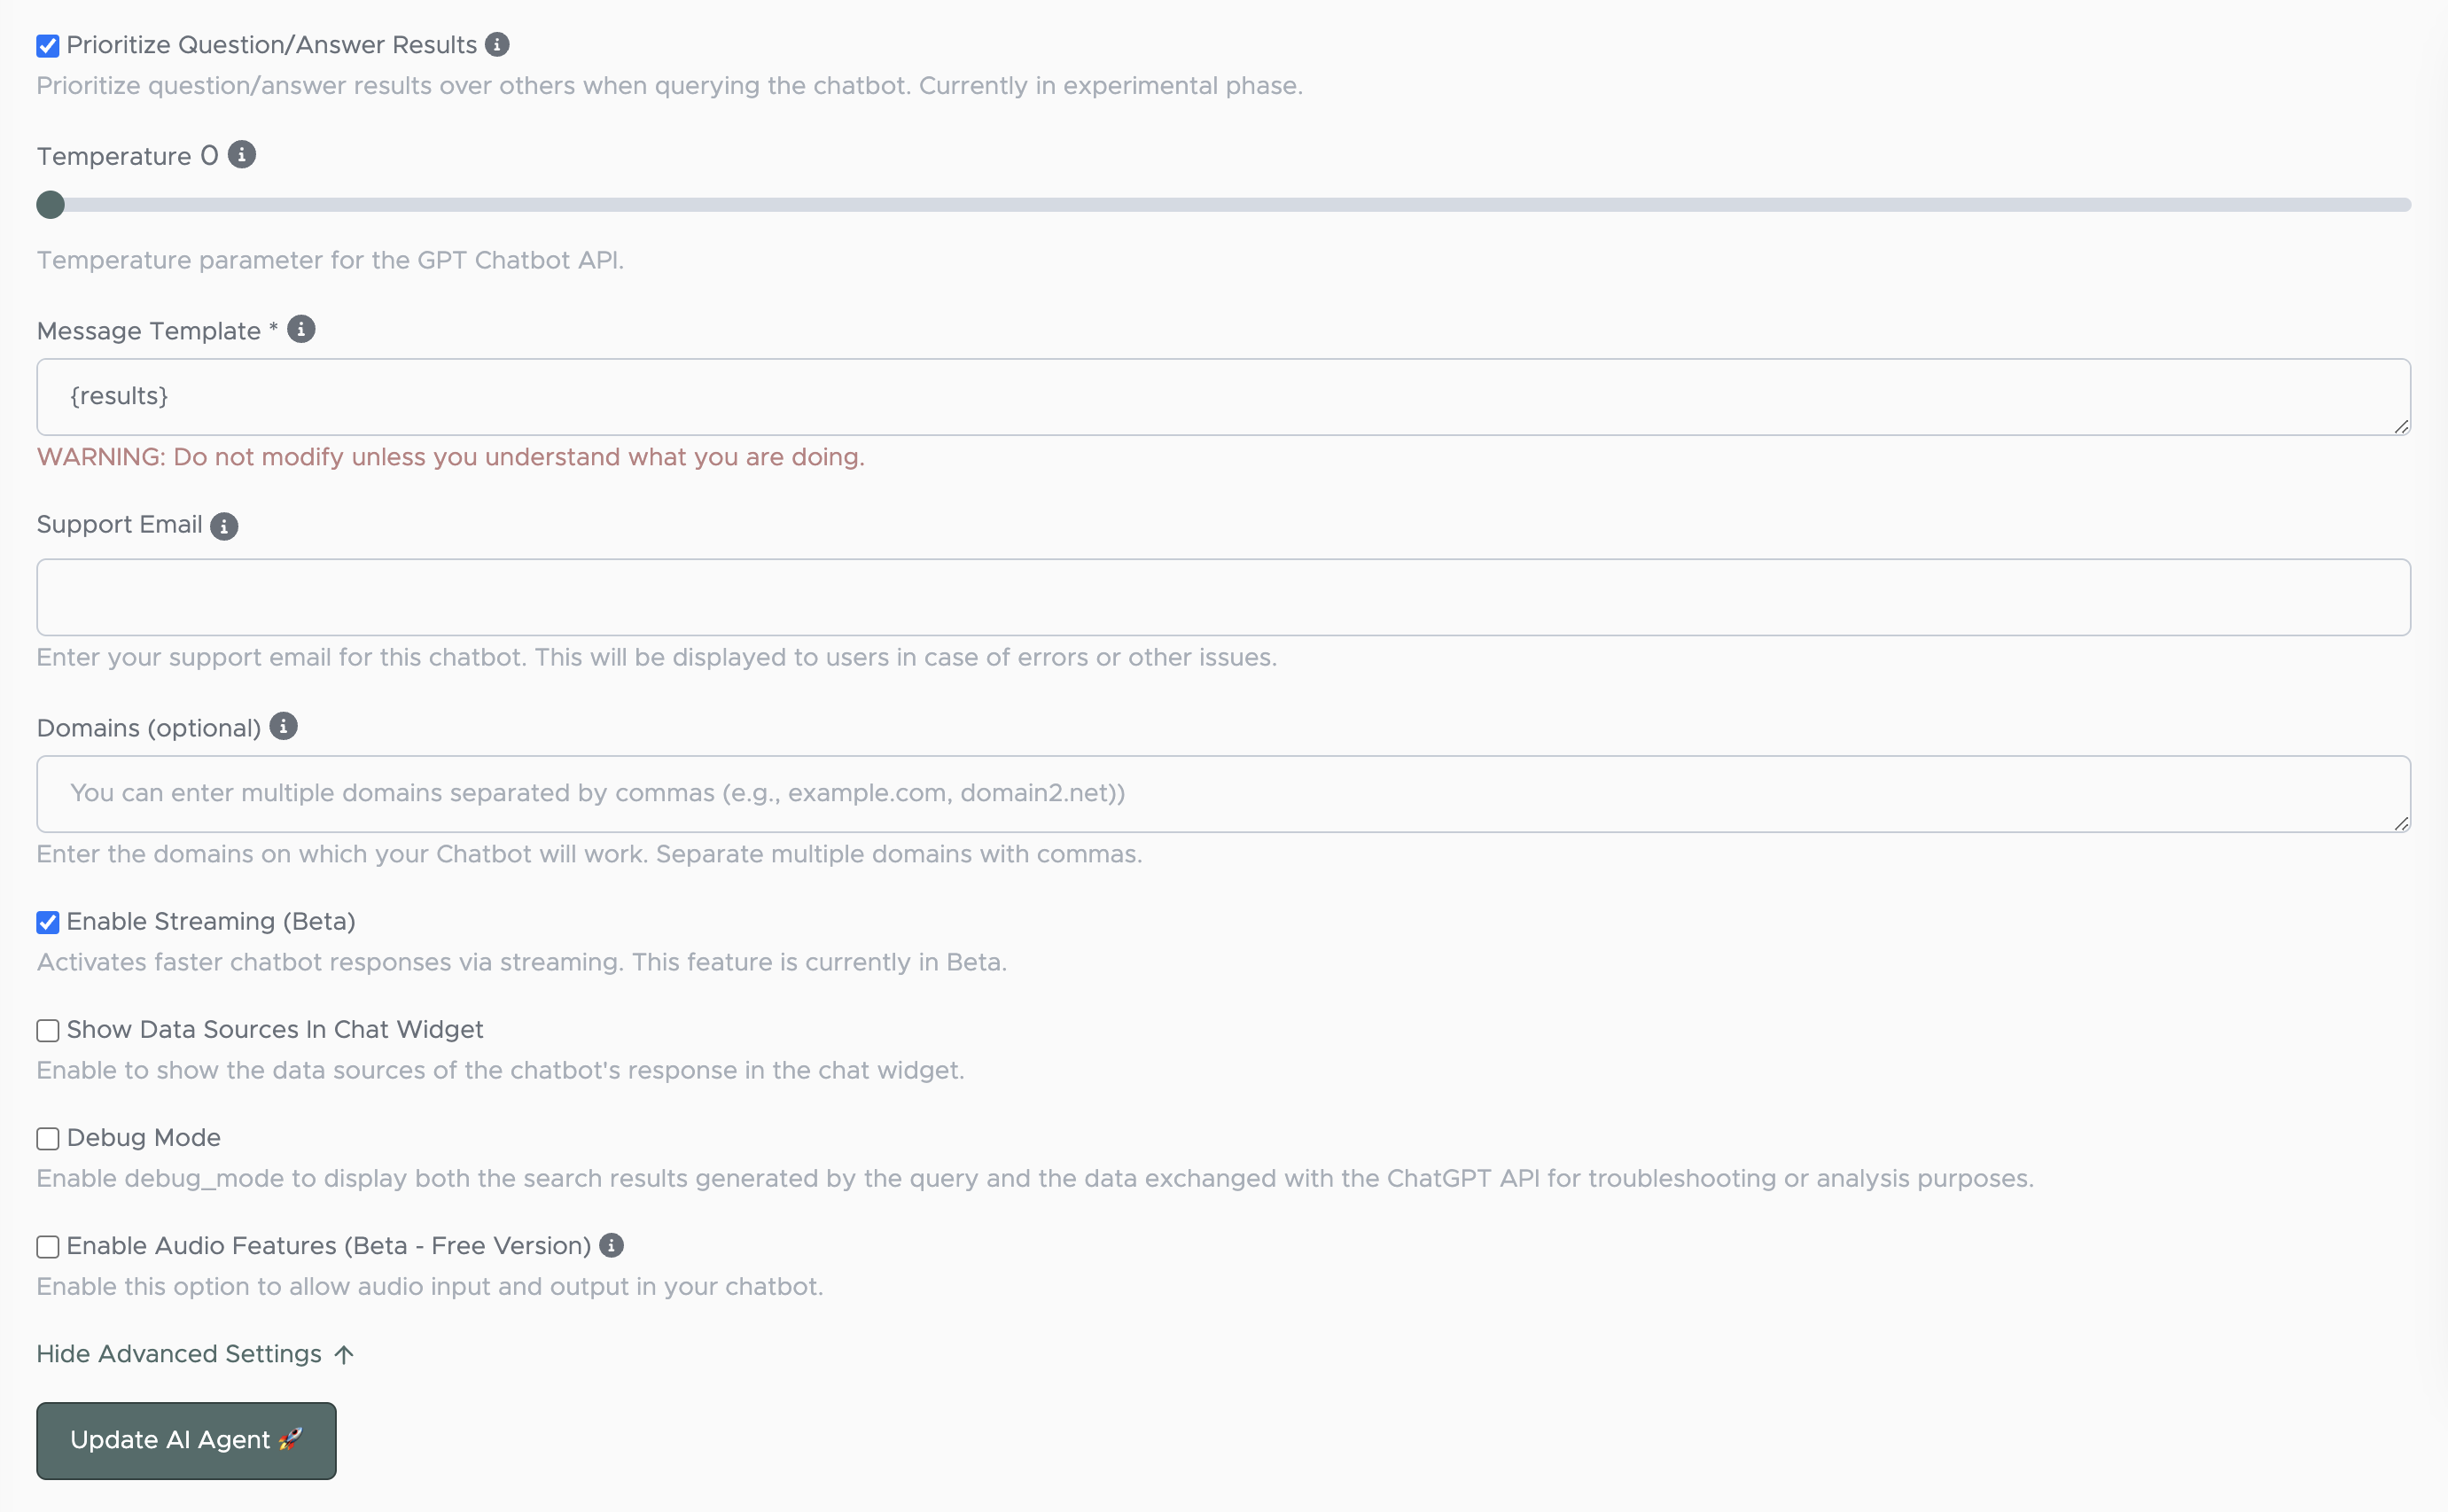
Advanced settings
Prioritize Question/Answer Results
Temperature
Message Template
This is an advanced feature for changing how the AI agent fundamentally works.
Warning: Modify this only if you understand what you are doing.
Modify the template used whenever a message is sent to ChatGPT. The message template is displaying how the AI chatbot will process data from the knowledge base and add it to your base system prompt.
If you are looking to create an alternative AI agent that can do different things like classify text, write emails, or any other use case you could imagine.
Support Email
Enter your support email for this chatbot. This will be displayed to users in case of errors or other issues.
Domains
Enter the domains on which your Chatbot will work. Separate multiple domains with commas.
This feature is closely related to Visibility. If a website’s visibility is set to public, then this section does not apply. If embedding the chatbot on a website, enter the exact domain URL in this format: ‘https://yourdomain.com’
Debug Mode
This is helpful to enable when testing a new AI agent to see what data is being sent to OpenAI.
Enable Debug mode to display both the search results generated by the query and the data exchanged with the ChatGPT API for troubleshooting or analysis purposes.
Show Data Sources in Chat Widget
Enable to show the data sources of the chatbot’s response in the chat widget.
When an AI agent responds and is shown to a user, a little dropdown menu toggle will show up underneath the message response showing the links to where the AI agent found the answers.
This is only available for public websites scraped with the AI agent scraper.
Empower your chatbot with accurate and relevant knowledge
A Knowledge Base is a centralized repository of information that contains all necessary data (webpage contents, articles, FAQs, guides, and solutions to common questions), enabling the chatbot to provide quick, accurate responses to customer inquiries.
There are several ways to add data to your Knowledge base:
- Text: Copy & paste text
- Files: Upload documents
- Website: Scrape URLs
- Q/A: Question & Answers (Q&As)
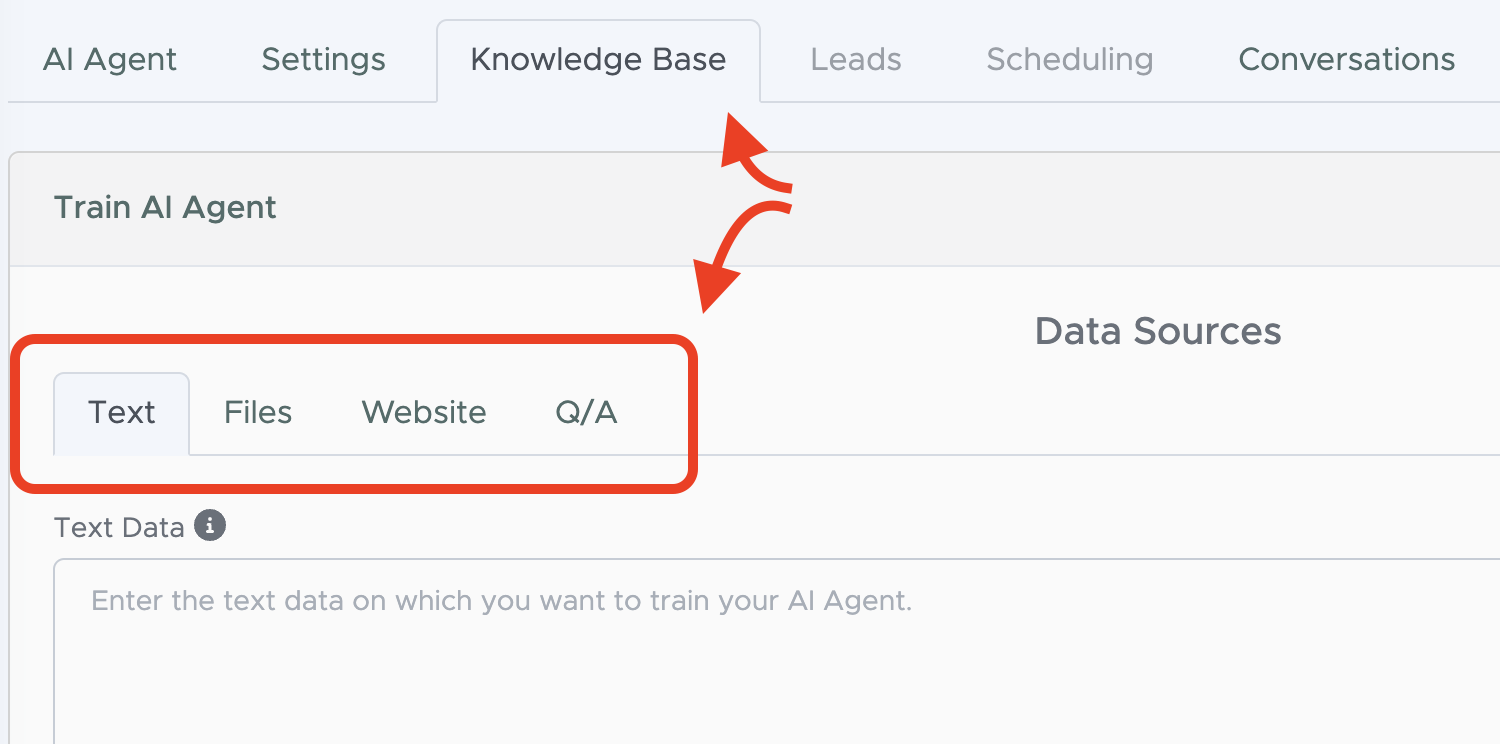
Text
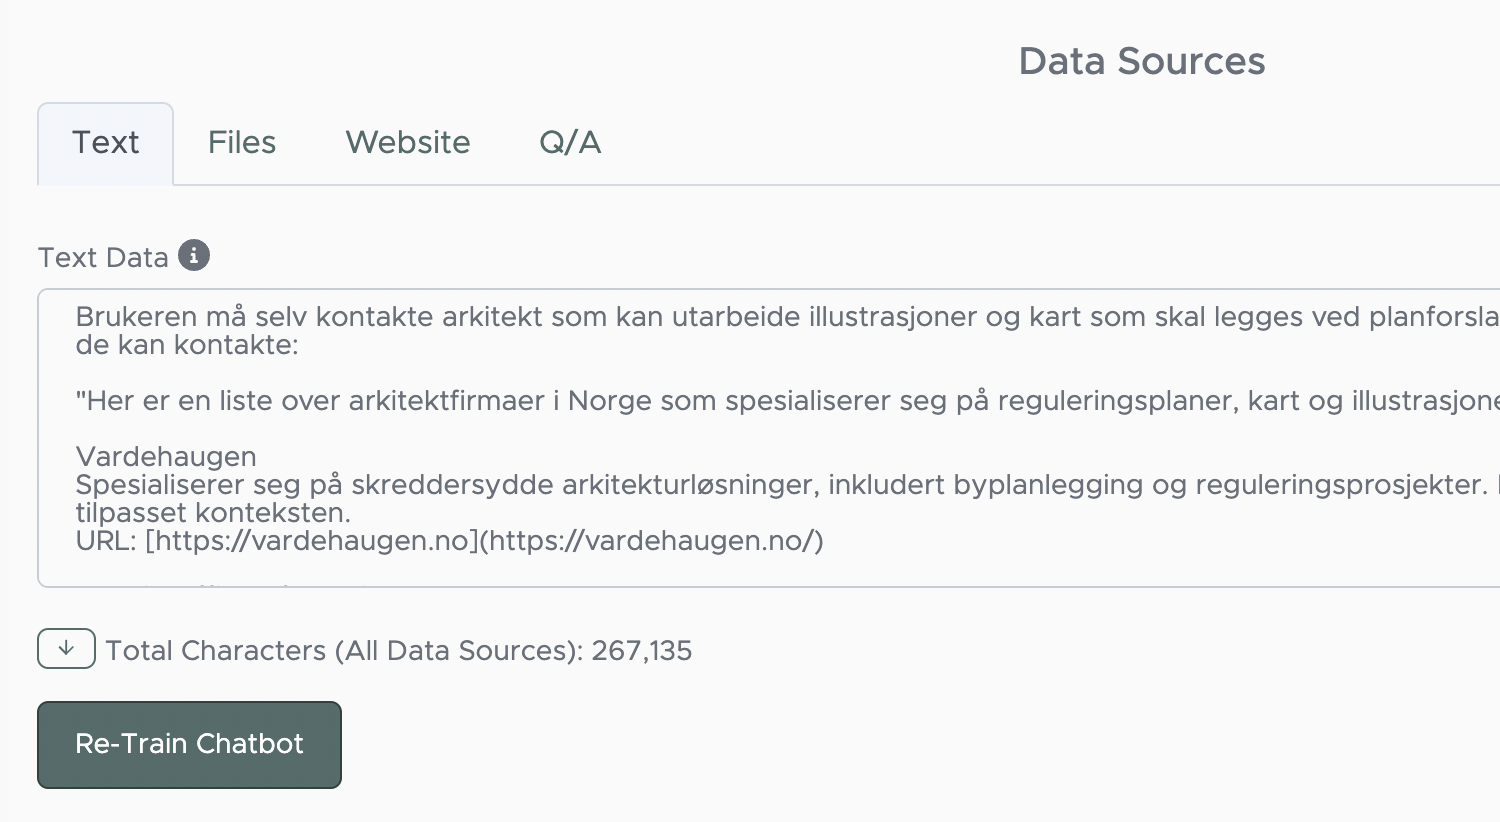
Copy and paste text
Simply paste in text to train the AI chatbot.
This option allows you to structure the information in an optimal format, ensuring the chatbot can provide the most accurate and relevant responses.
It’s particularly beneficial when dealing with complex, intertwined information from various documents or website texts, where fine details are hard to separate.
Choosing Text Data allows you to bypass limitations in existing formats, enabling the chatbot to deliver more precise and nuanced answers.
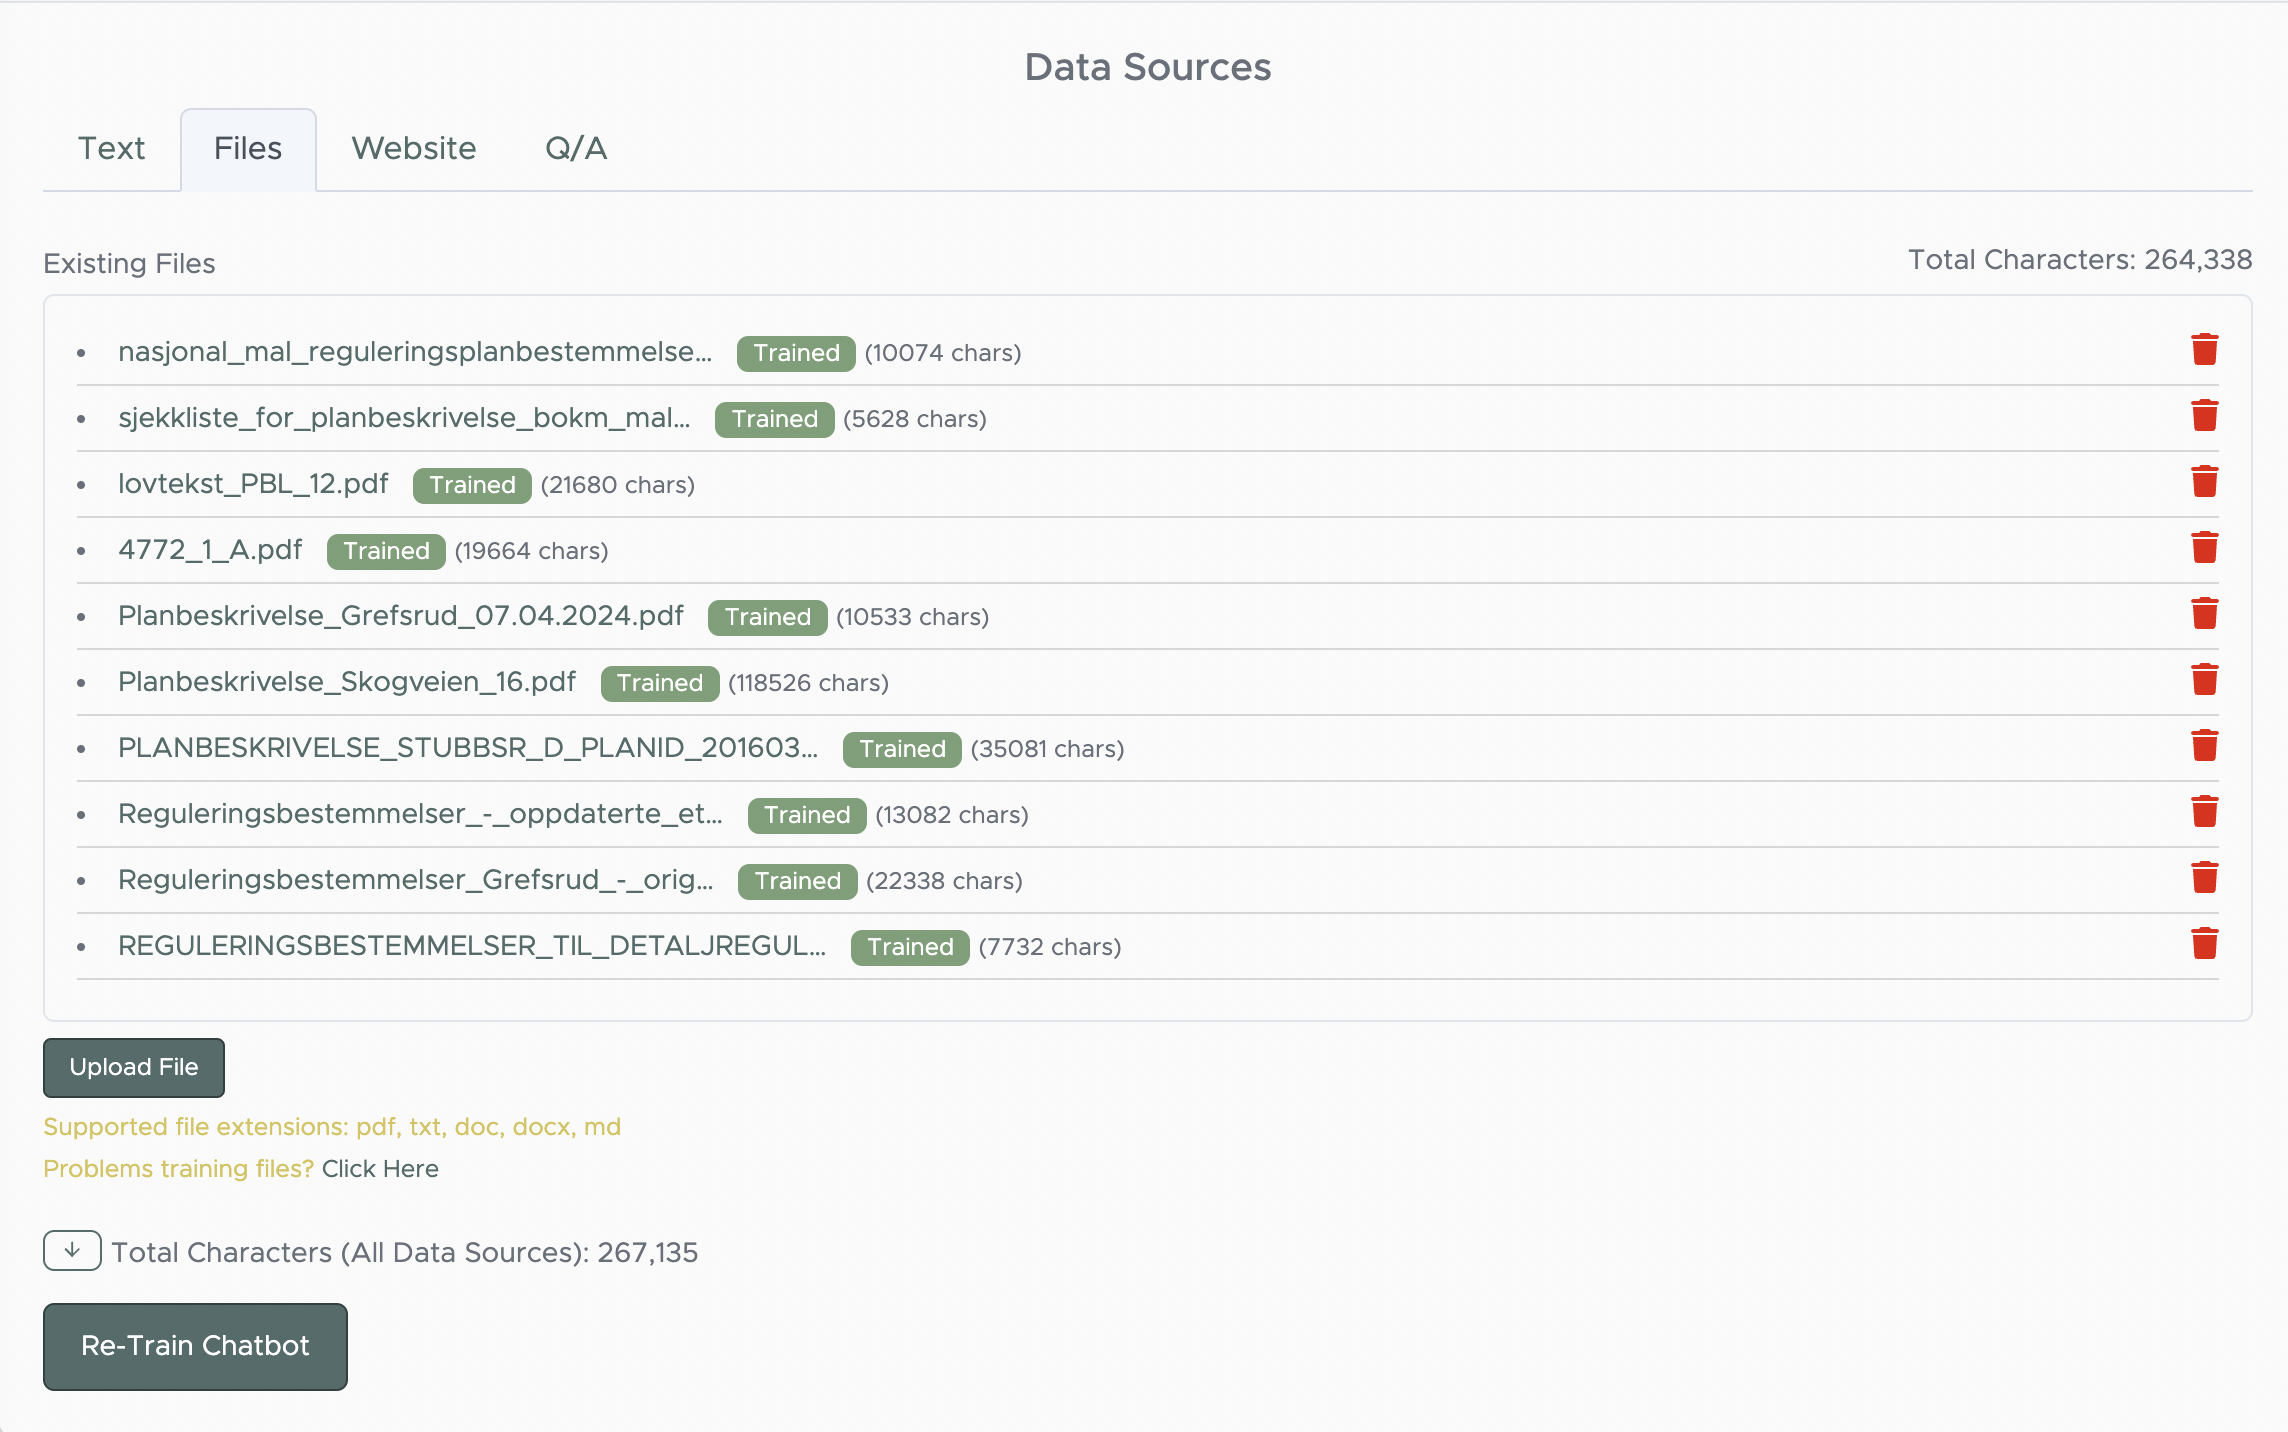
Files
Upload documents and files
Supported file extensions: pdf, txt, doc, docx, md
You can also upload documents and files to your Knowledge Base.
Uploading documents and files to the chatbot’s knowledge base enables it to access and retrieve information directly from your materials, allowing for more accurate and relevant responses tailored to your content.
This option streamlines complex information, ensuring the chatbot has comprehensive knowledge to assist your customers effectively.
Website
Scraping URLs
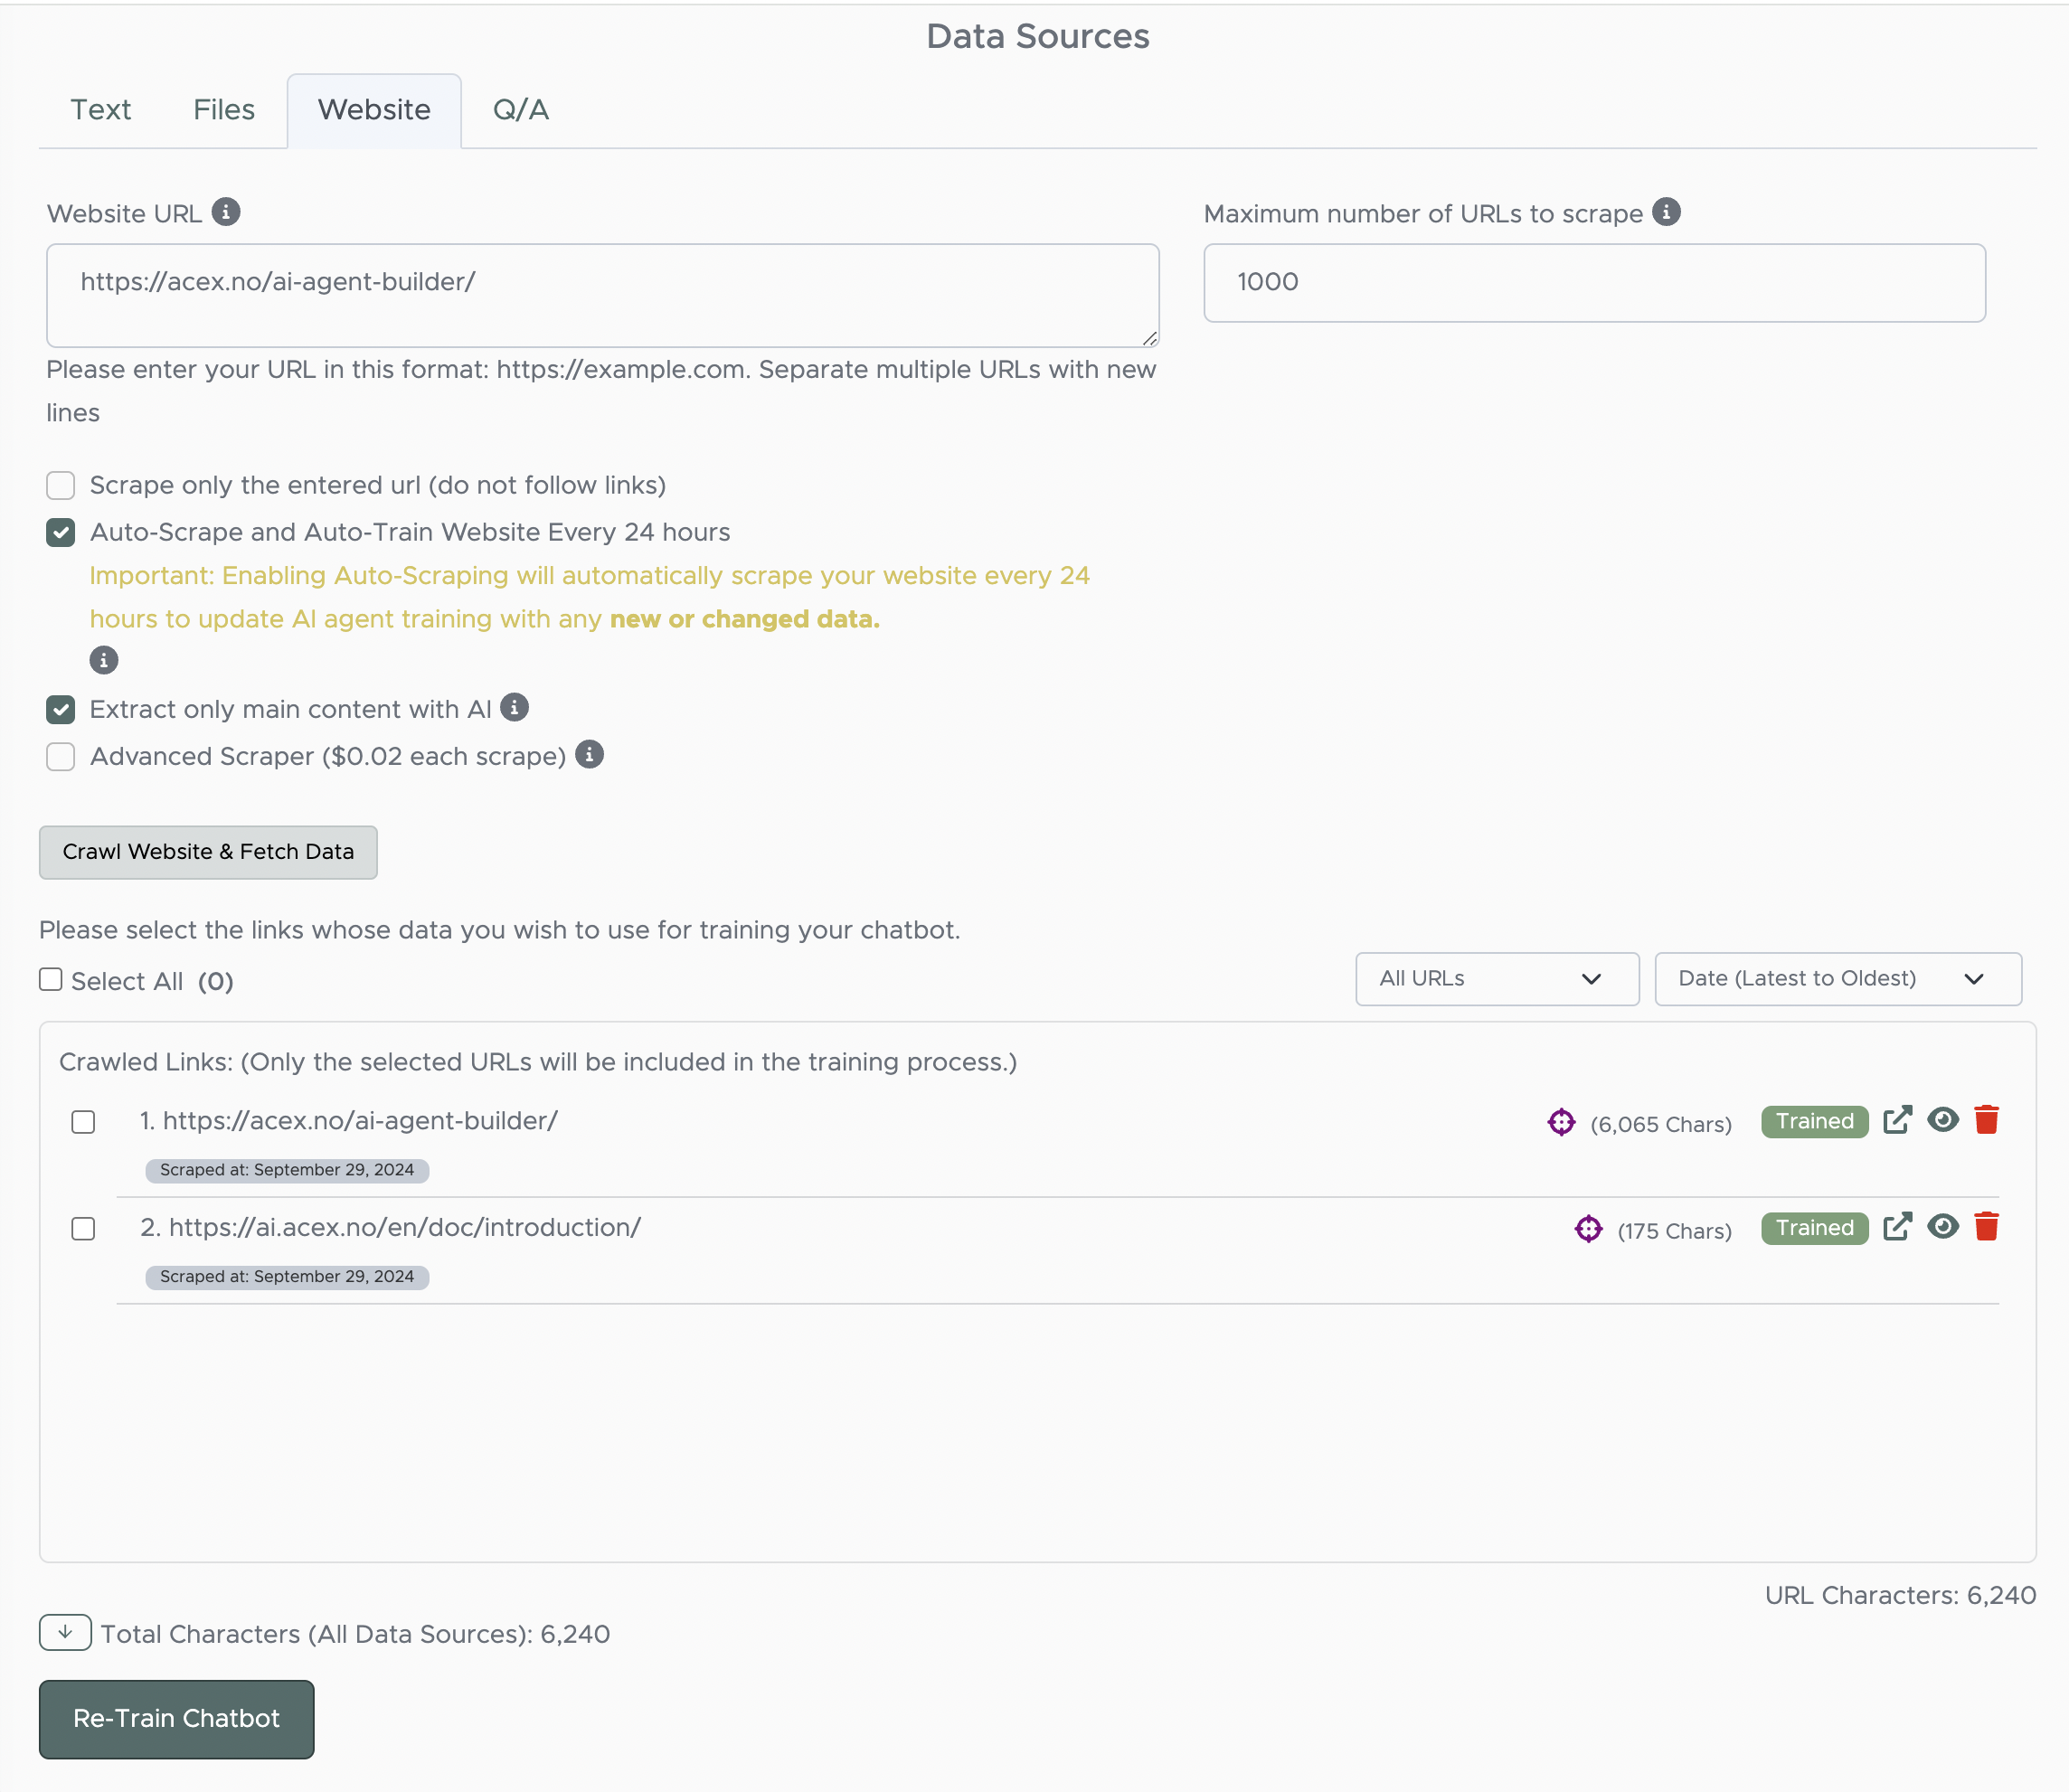
Website URL
Enter your website URLs to extract text data from specific webpages. This feature is useful in training your chatbot`s knowledge base on information from your website. We recommend including only pertinent pages related to your products and services.
Enter your URL in this format: https://example.com
You can enter multiple URLs separated by new lines.
You can limit the number of scraped URLs by entering a Maximum number of URLs to scrape
The checkboxes – What to scrape?
By default, the scrapers will follow any links found on the entered URLs. To avoid following links, check the box for Scrape only the entered url (do not follow links).
If the content of the websites are frequently renewing, you can check the box for Auto-Scrape and Auto-Train Website Every 24 hours.
If the webpages contains a lot of repeating or irrelevant content (like menus, or other global elements) you can check the box for Extract only main content with AI
Advanced Scraper uses our advanced web scraping technology to handle websites that block traditional web scrapers or rely heavily on JavaScript rendering – such as Single-Page Applications (SPA).
Start scraping
Press the button Crawl Website & Fetch Data to scrape your URLs.
You can add more URLs later.
Train your chatbot
Please select the links whose data you wish to use for training your chatbot.
Press the button Train Chatbot to add this data to your Knowledge Base.
Q/A
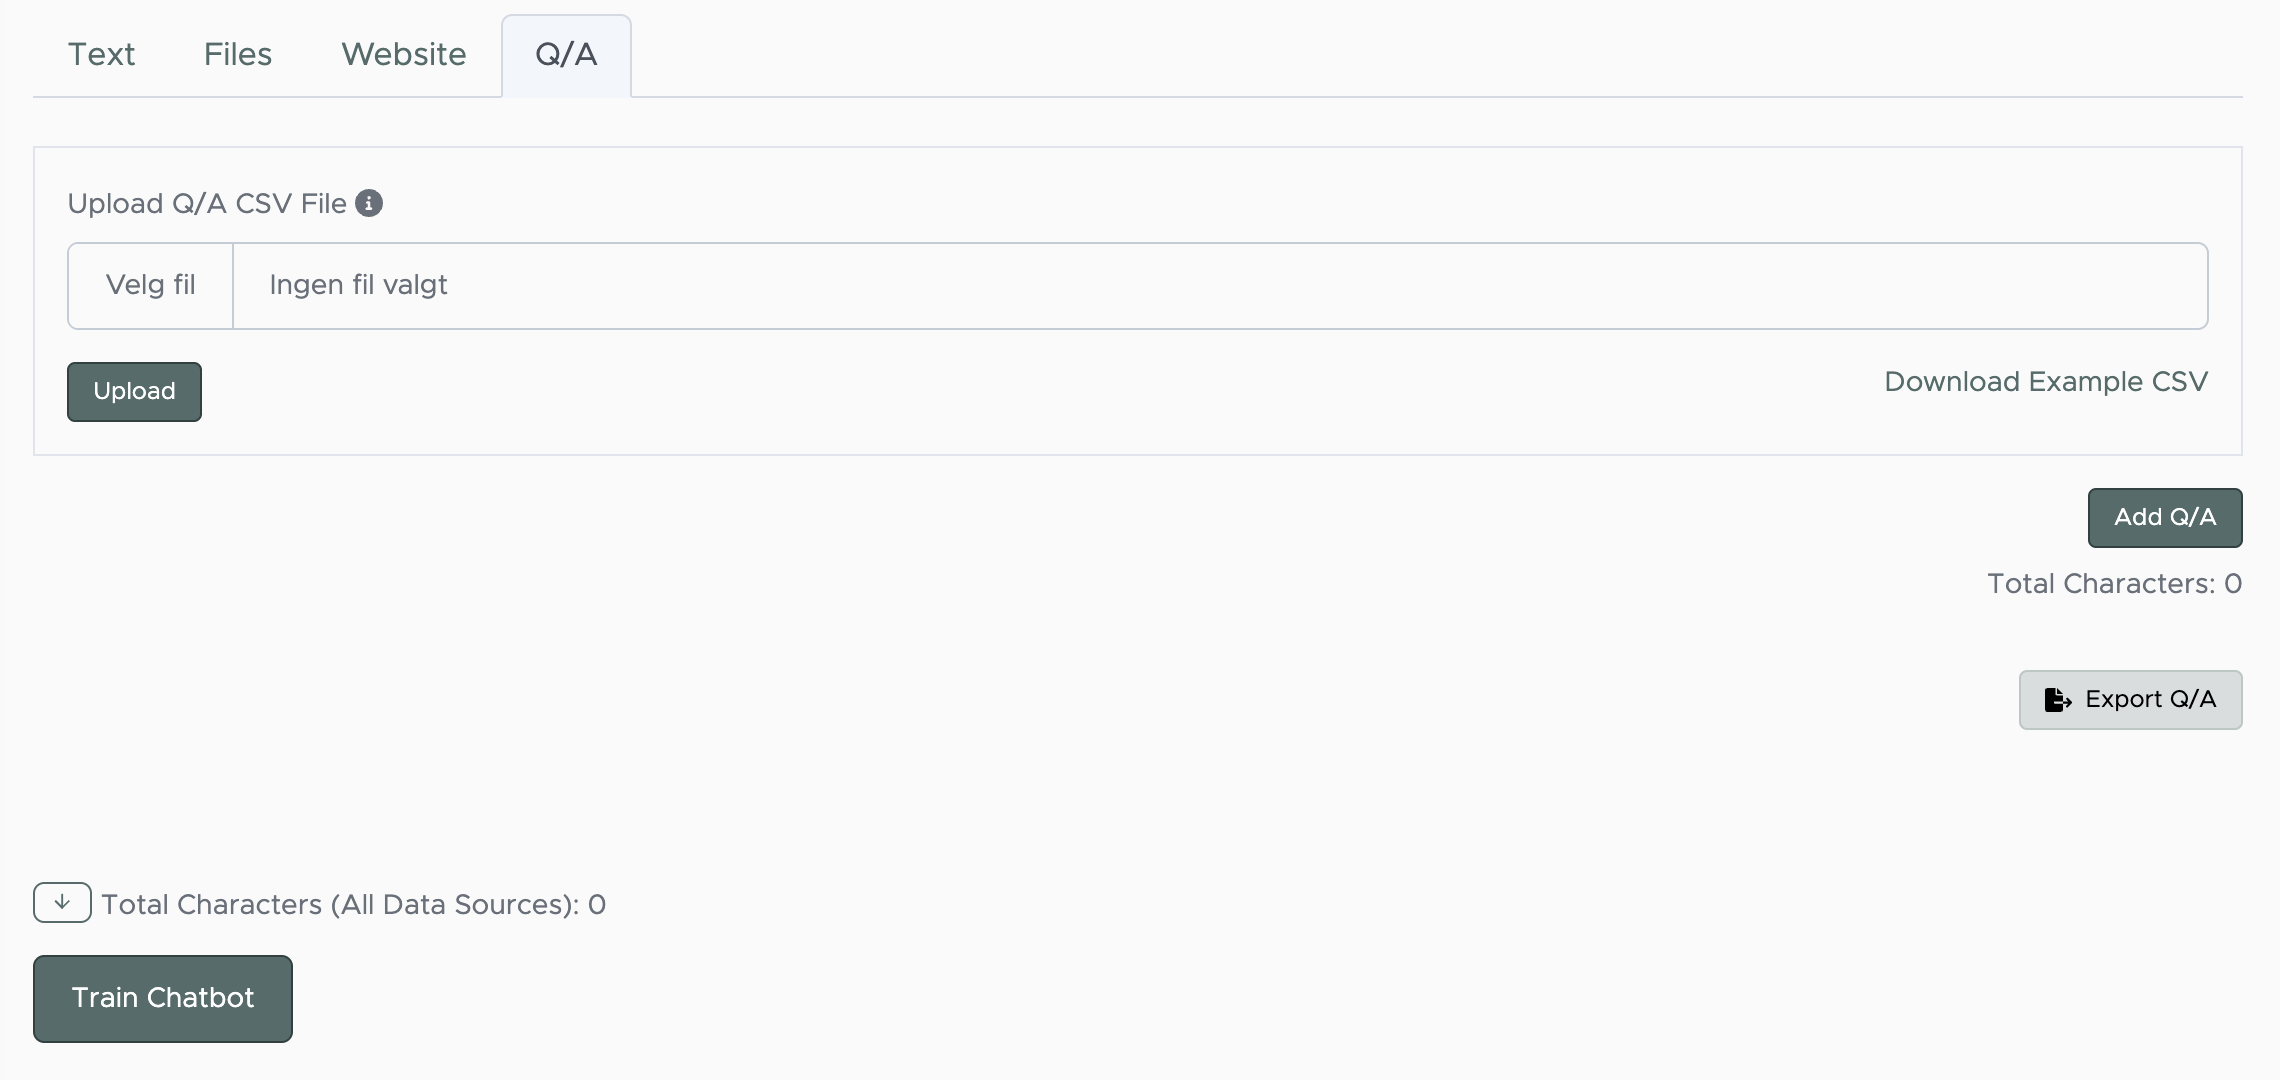
Upload Questions & Answers (Q&As)
Supported file extensions: csv
Upload a CSV file to quickly and efficiently add multiple questions and answers in bulk.
Pro tip: You can use ChatGPT or Claude to extract data from files or URLs, and present it in a Q/A-format
ACEX AI
Org.nr. 933 356 264 MVA
© 2024 ACEX AI AS


